Client onboarding
Add a client end‑to‑end — the 3‑step intake wizard, profile tabs, and where their plan lives.
Adding a client is a single three‑step wizard — Identity → Goals & body → Plan. Only the name and email are required, so you can get someone into the system in well under a minute and fill the rest in later.
Open the Add Client wizard
You can open it from anywhere — the Add client button is pinned to the bottom of the sidebar, and there's a matching button on the Clients list page.
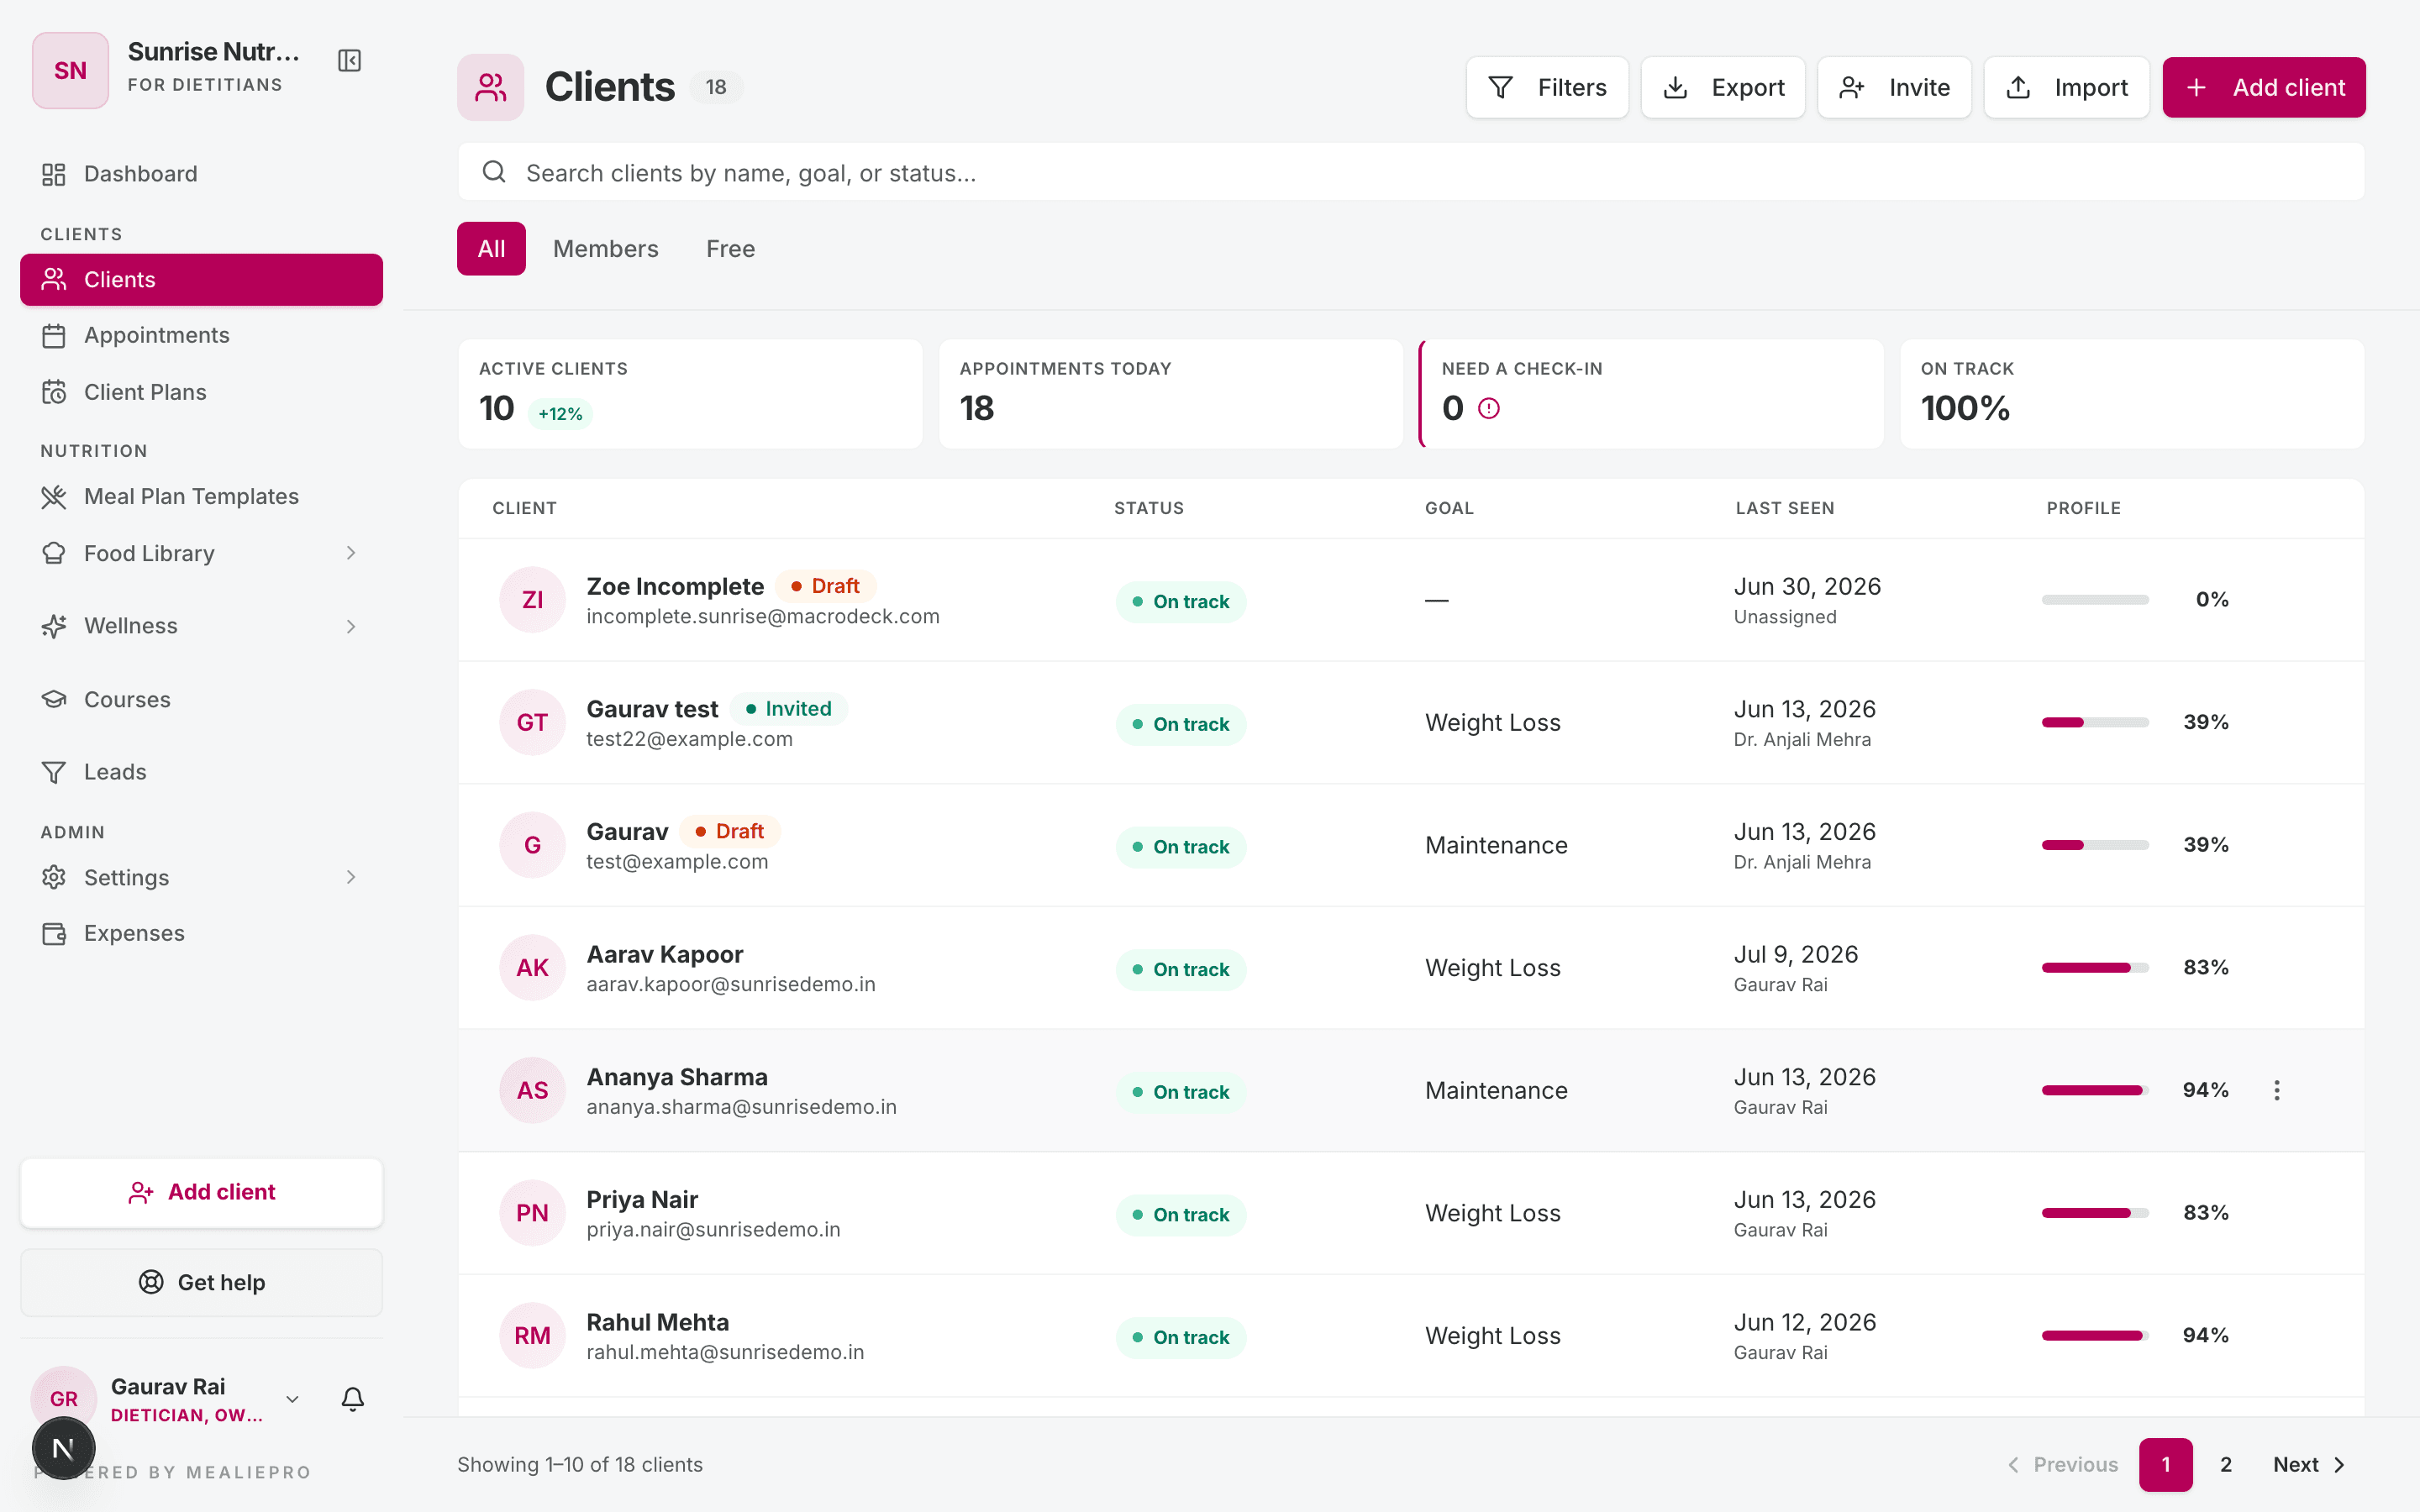
The Clients list itself is worth a tour: filter, export, invite (sends a portal invitation by email), and import (CSV bulk add) all sit in the top‑right toolbar.
Each step saves as you go. The client record is created the moment you finish Step 1, and every later step saves with Next. If you get interrupted, the client is already there — reopen them and you'll be dropped back on the first incomplete step.
Step 1 — Identity
Who the client is and how you reach them.
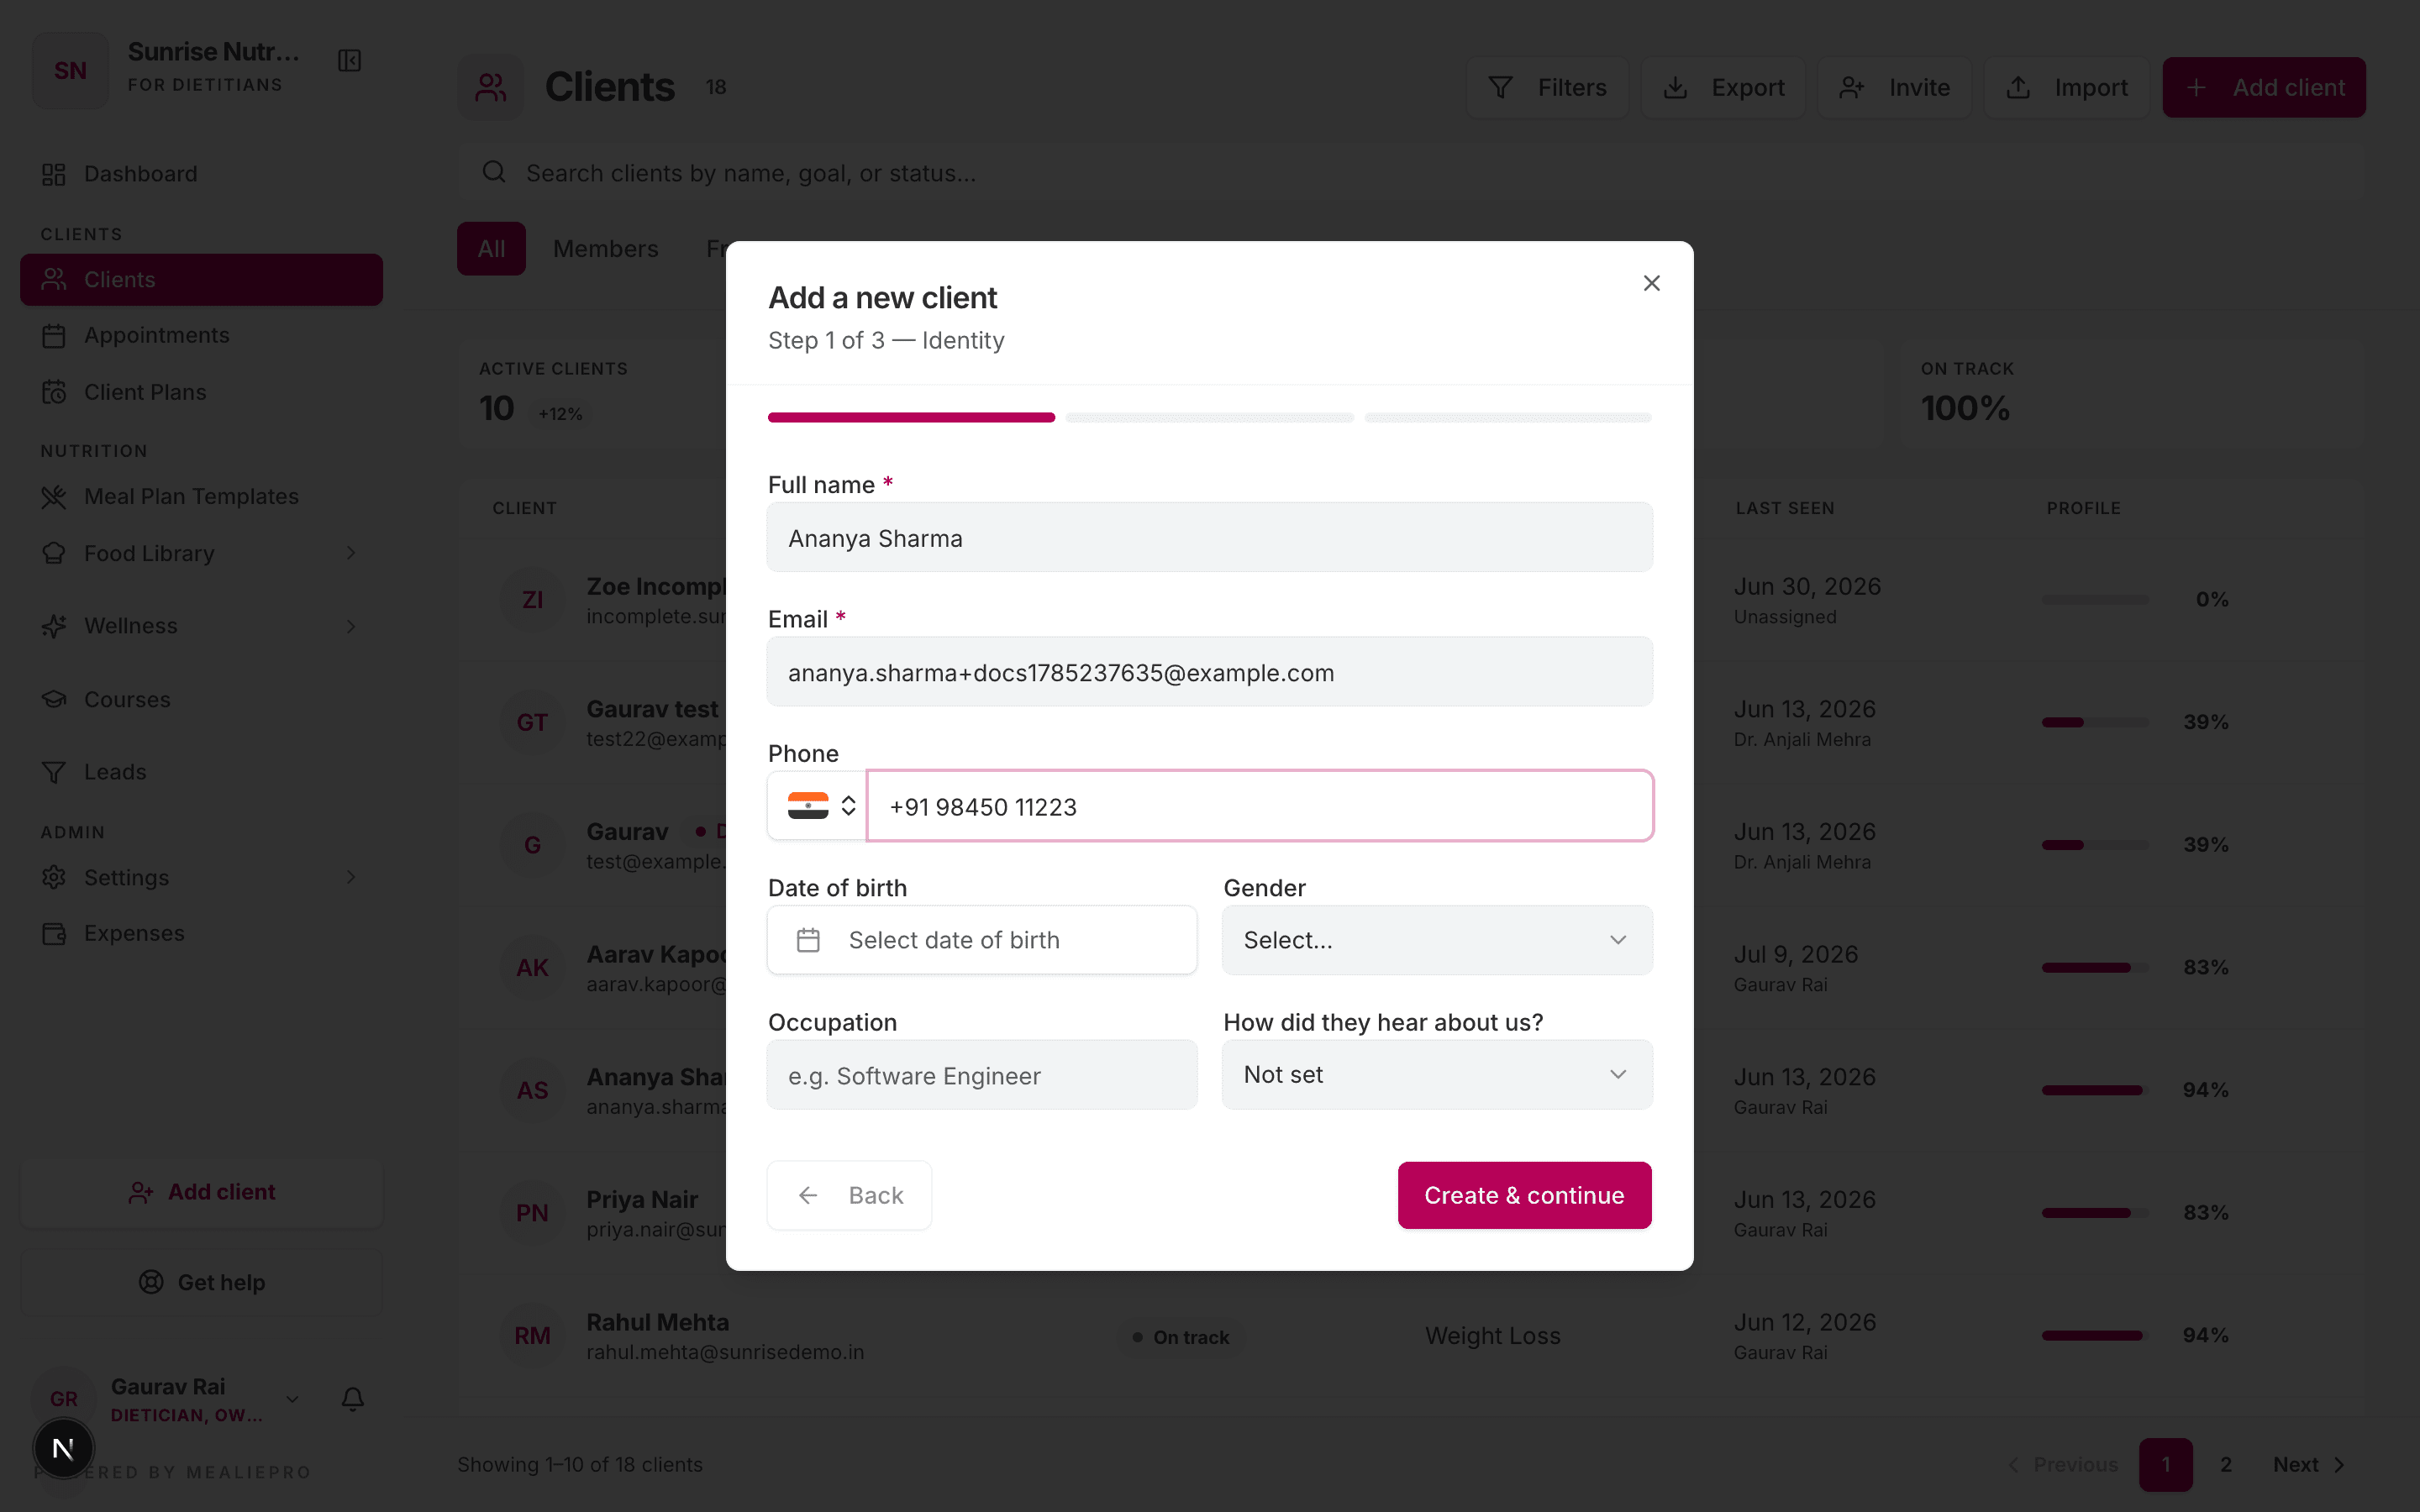
Full name and email are both required — the email is their login for the client portal, so you can't defer it. Everything else on this step is optional:
| Field | Why it matters |
|---|---|
| Phone | Contact only. |
| Date of birth | Feeds BMR/TDEE, so it drives every macro target downstream. |
| Gender | Male / Female / Other / Prefer not to say. Also feeds BMR/TDEE. |
| Occupation | Context for lifestyle advice. |
| How did they hear about us? | Attribution — useful once you're running Leads. |
Tip: if the client genuinely has no email, use a placeholder you control (e.g.
clientname@yourclinic.com) and correct it before you invite them to the portal. Creating the record without one isn't possible.
Step 2 — Goals & body
The clinical picture, and where the daily macro targets come from.
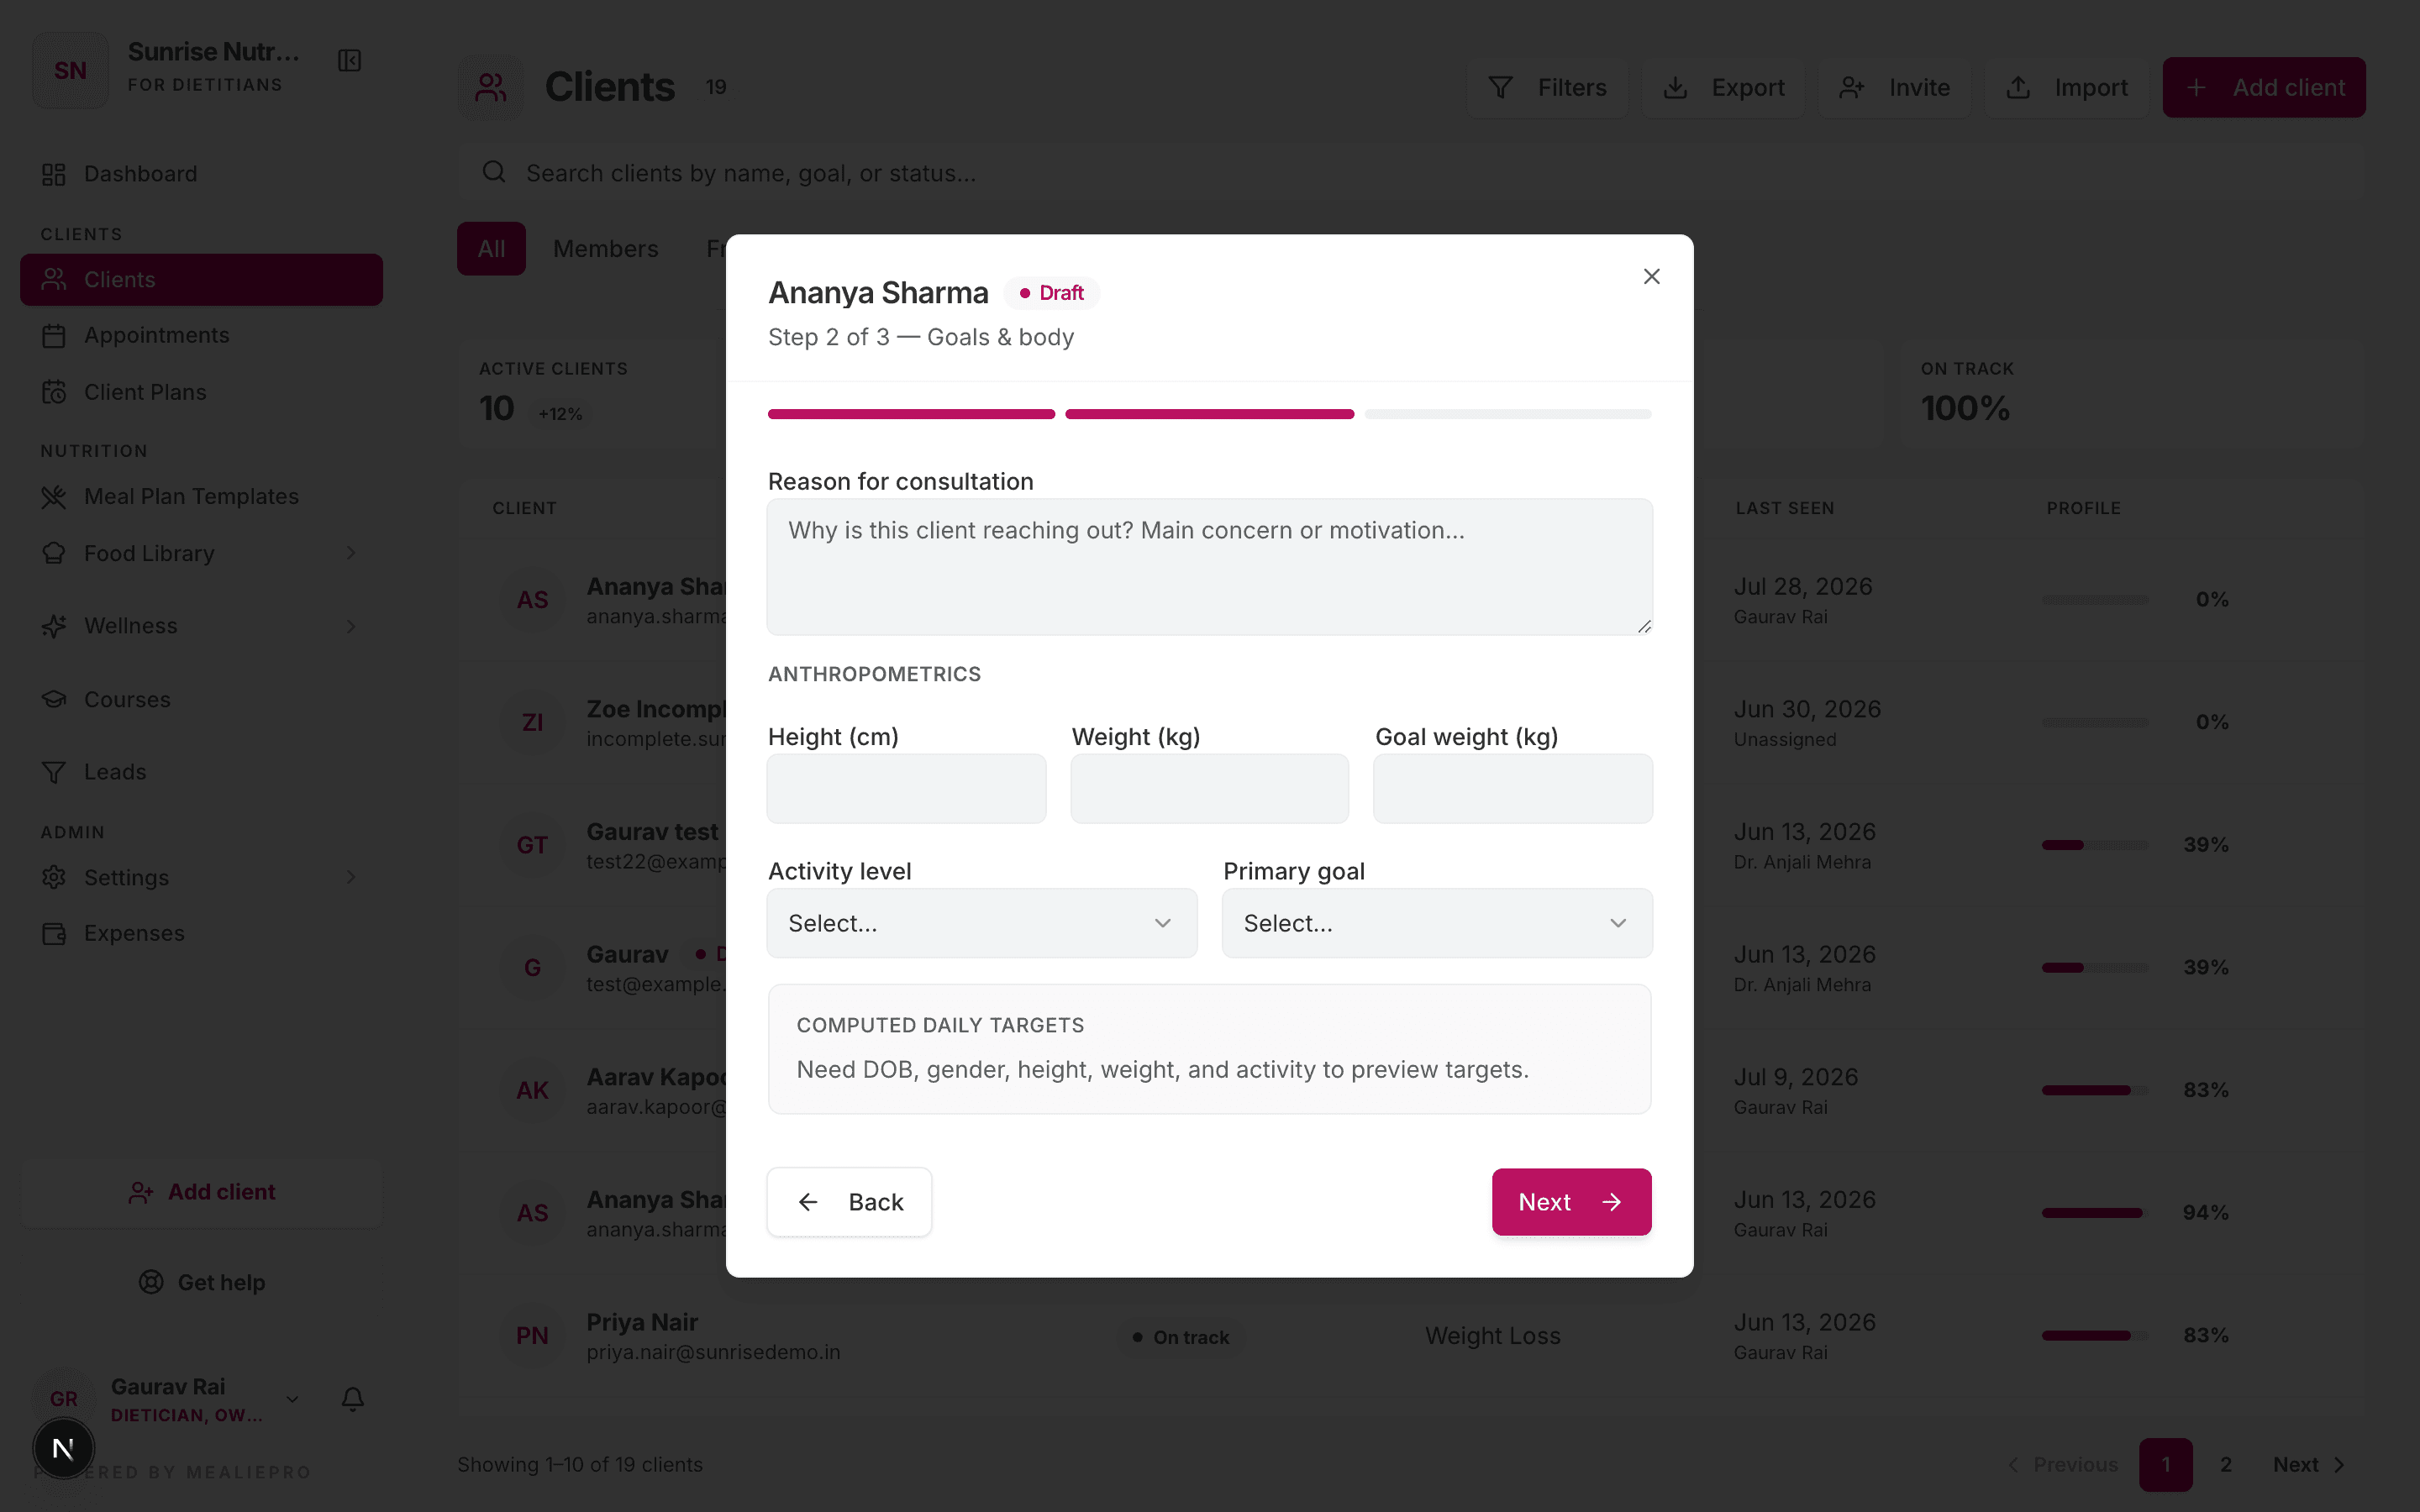
- Reason for consultation — free text. Why are they here, in their words. Worth filling: it's the context you'll want at the next appointment.
- Anthropometrics — height (cm), current weight (kg), goal weight (kg).
- Activity level and Primary goal — these two, plus DOB/gender/weight, are what produce the client's daily calorie and macro targets.
The Computed daily targets panel at the bottom fills in once it has everything it needs — date of birth, gender, height, weight, and activity level. Until then it tells you which of those is still missing. If the numbers look wrong, fix the input rather than the target; they recalculate automatically.
Step 3 — Plan
Enrol the client into one of your client plans — a program with a fixed length, like a 90‑day package.
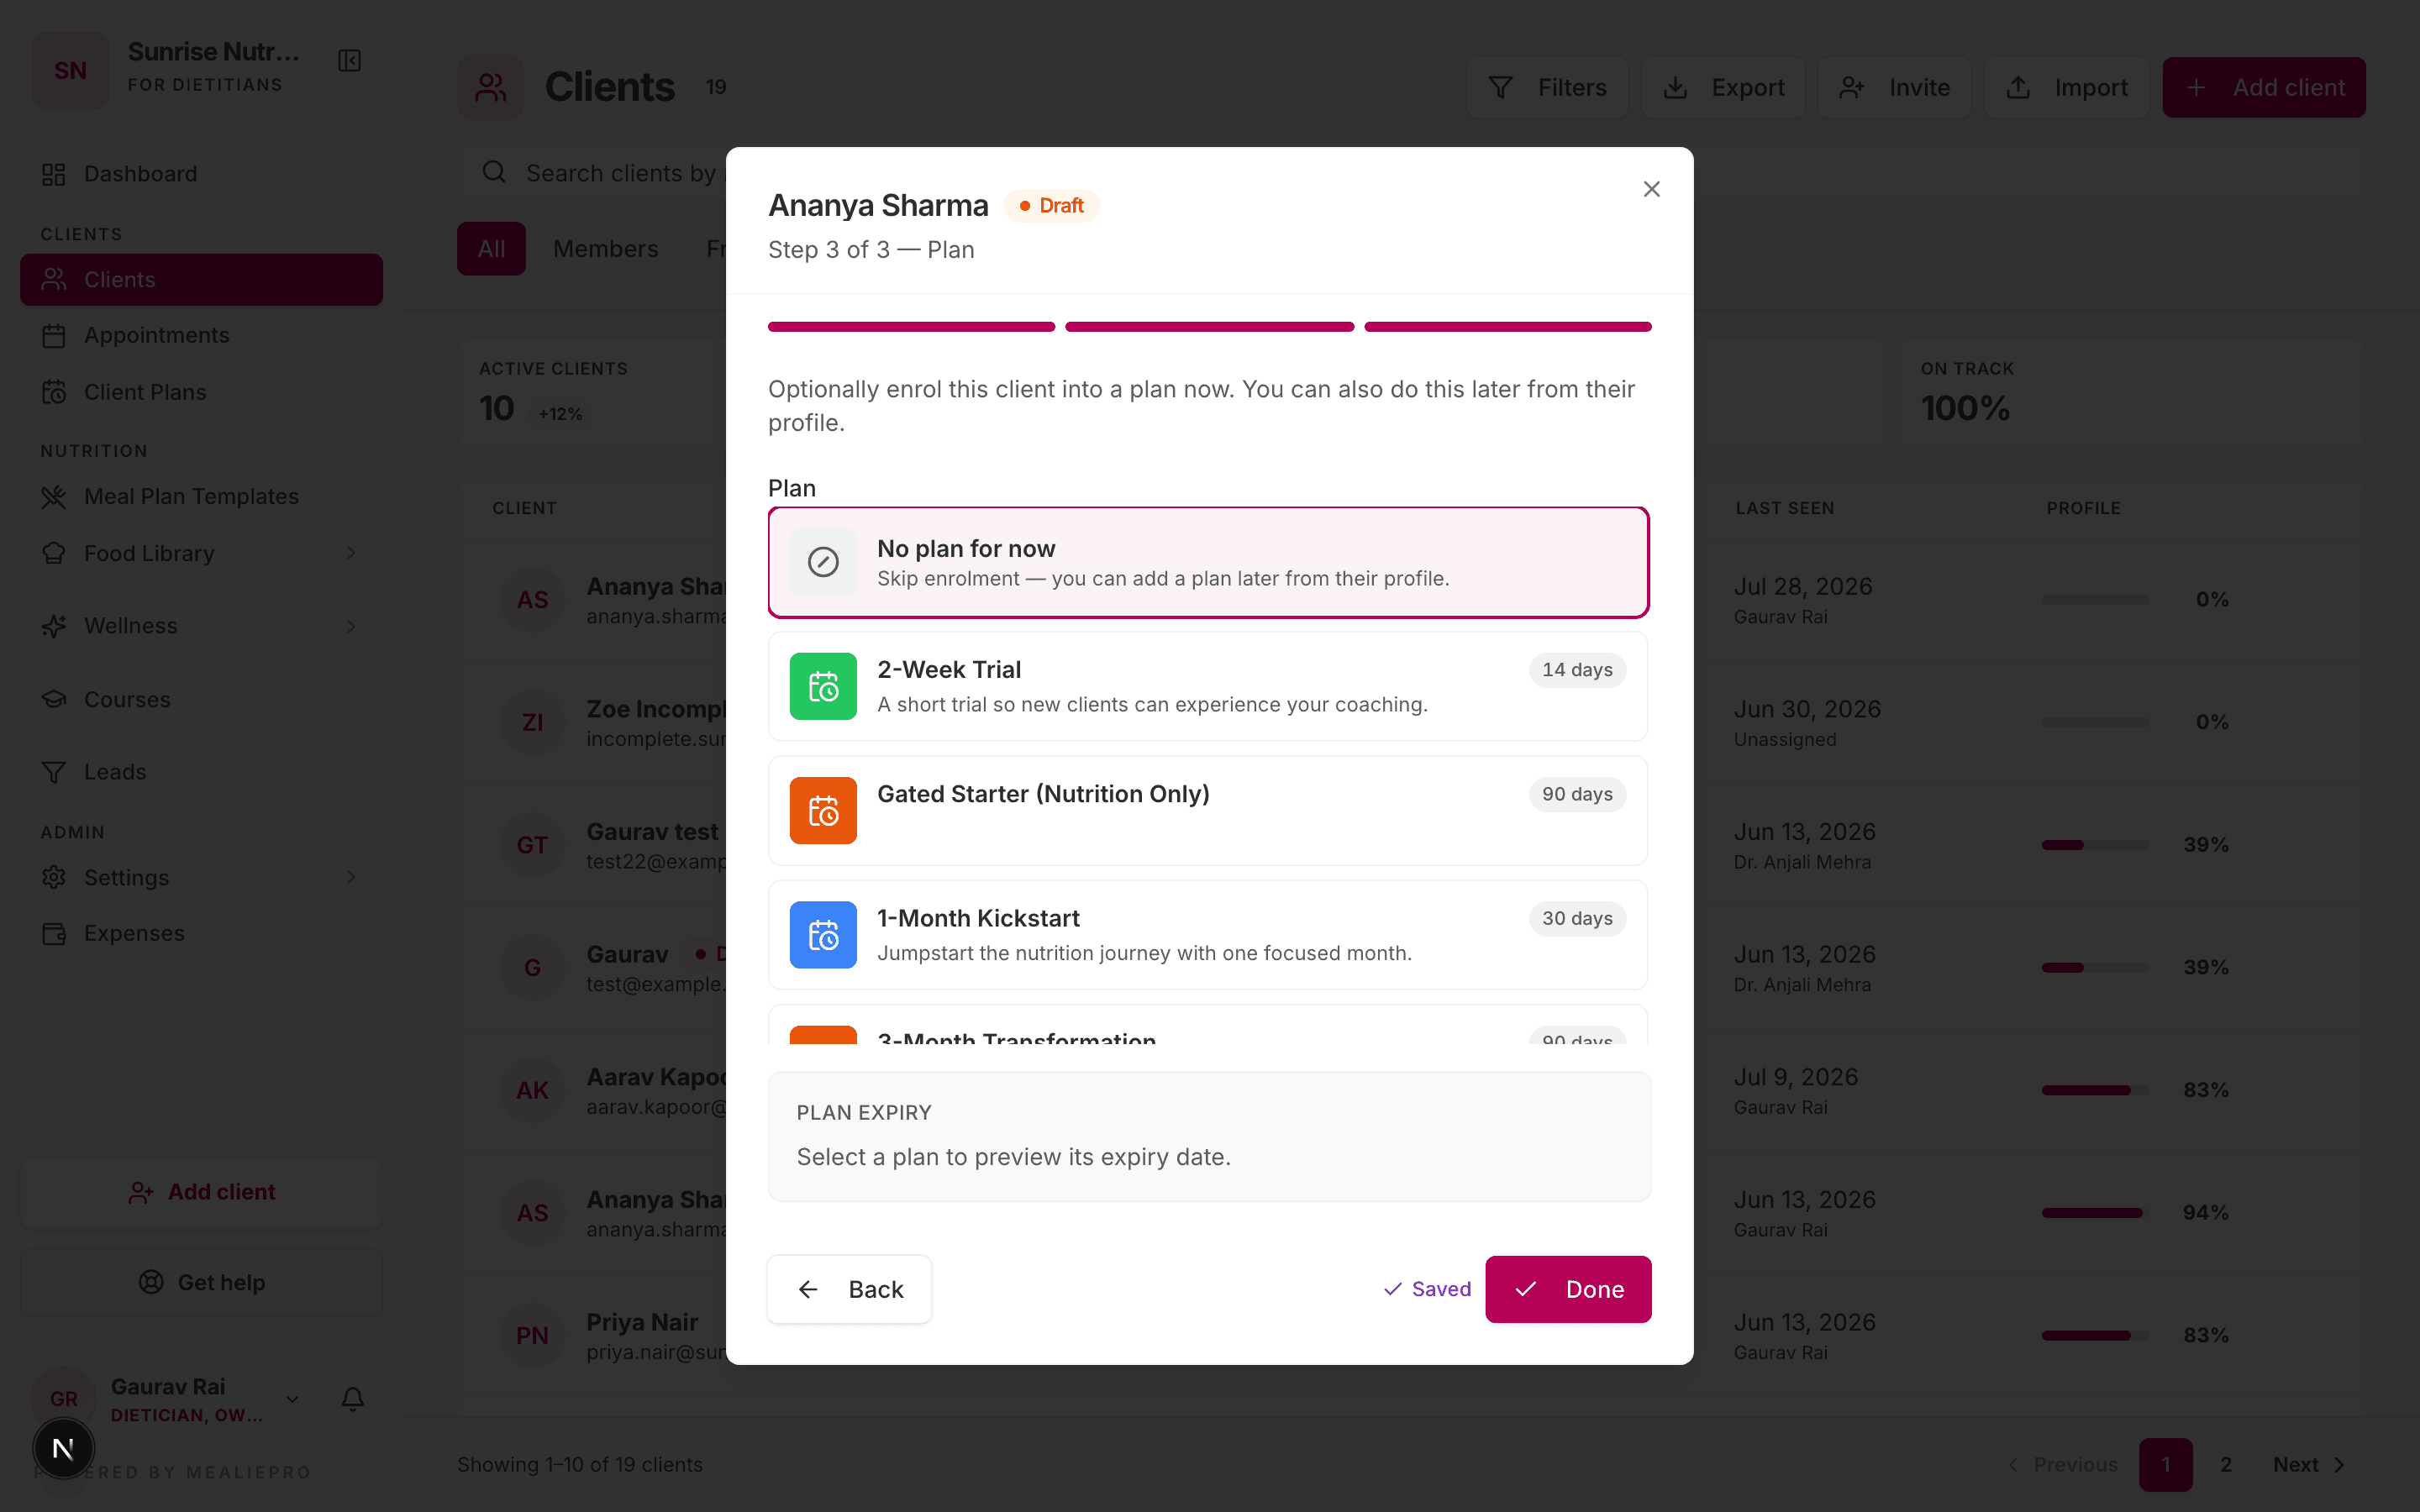
Pick a plan and set a start date; the wizard previews the expiry date it computes from the plan's duration. The first option is No plan for now — an explicit choice to skip enrolment, and you can add one later from the client's Membership tab.
Finish to save. You'll be dropped onto the client's profile page.
This is not your subscription. A client plan is the program you sell to the client. Your own subscription to the product lives under Settings › Plan & Billing.
The client profile
The profile is organised into tabs, each focused on a different layer of the client's record.
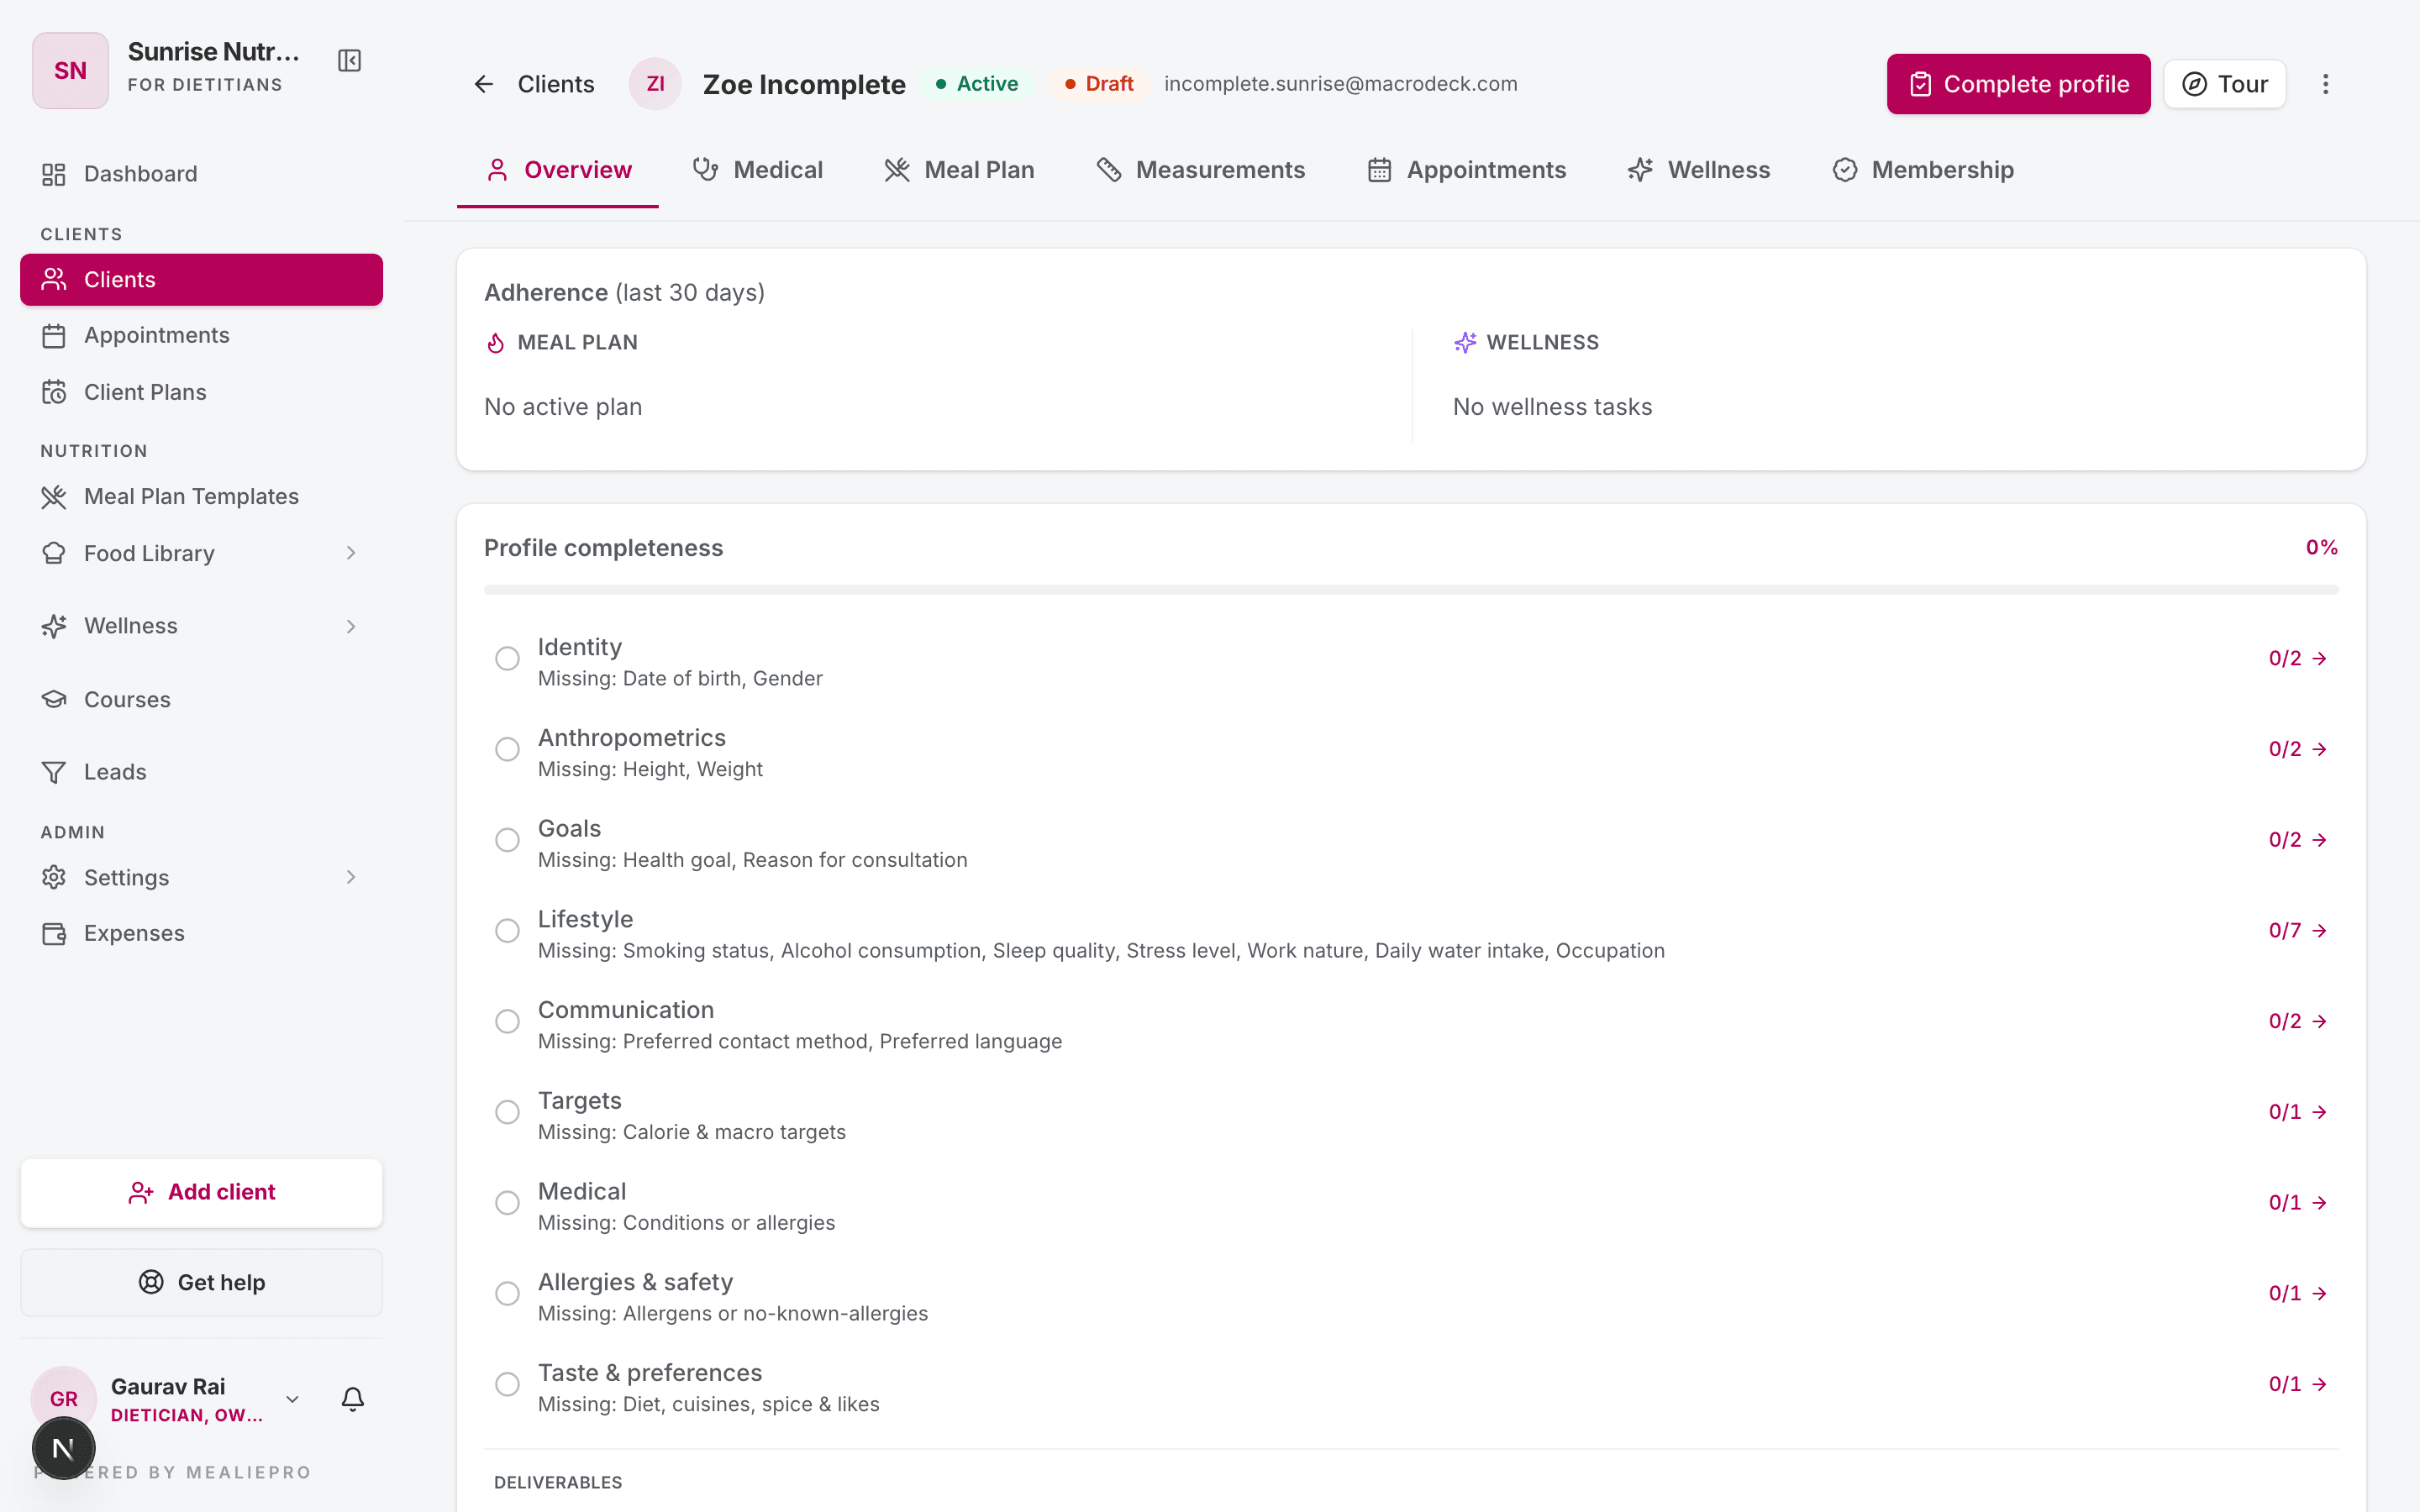
The tabs are Overview · Medical · Meal Plan · Measurements · Appointments · Wellness · Membership. (Wellness only appears if the wellness module is on for your plan.)
Overview
The home tab. Read‑only summary of contact, demographics, height/weight, activity, goal, and the live daily macro targets. Two side controls:
- Edit (pencil icon) on each card to update.
- Recalculate macros to refresh the daily targets after you change weight/activity/goal.
The taste profile card also lives here — mark the cuisines and foods the client likes, dislikes, or won't eat. It feeds straight into which dishes their plans can draw from.
Medical
Conditions, allergies, medications, and health intakes. This is where you capture diabetes, PCOD, hypertension, anything the recipe matcher should respect.
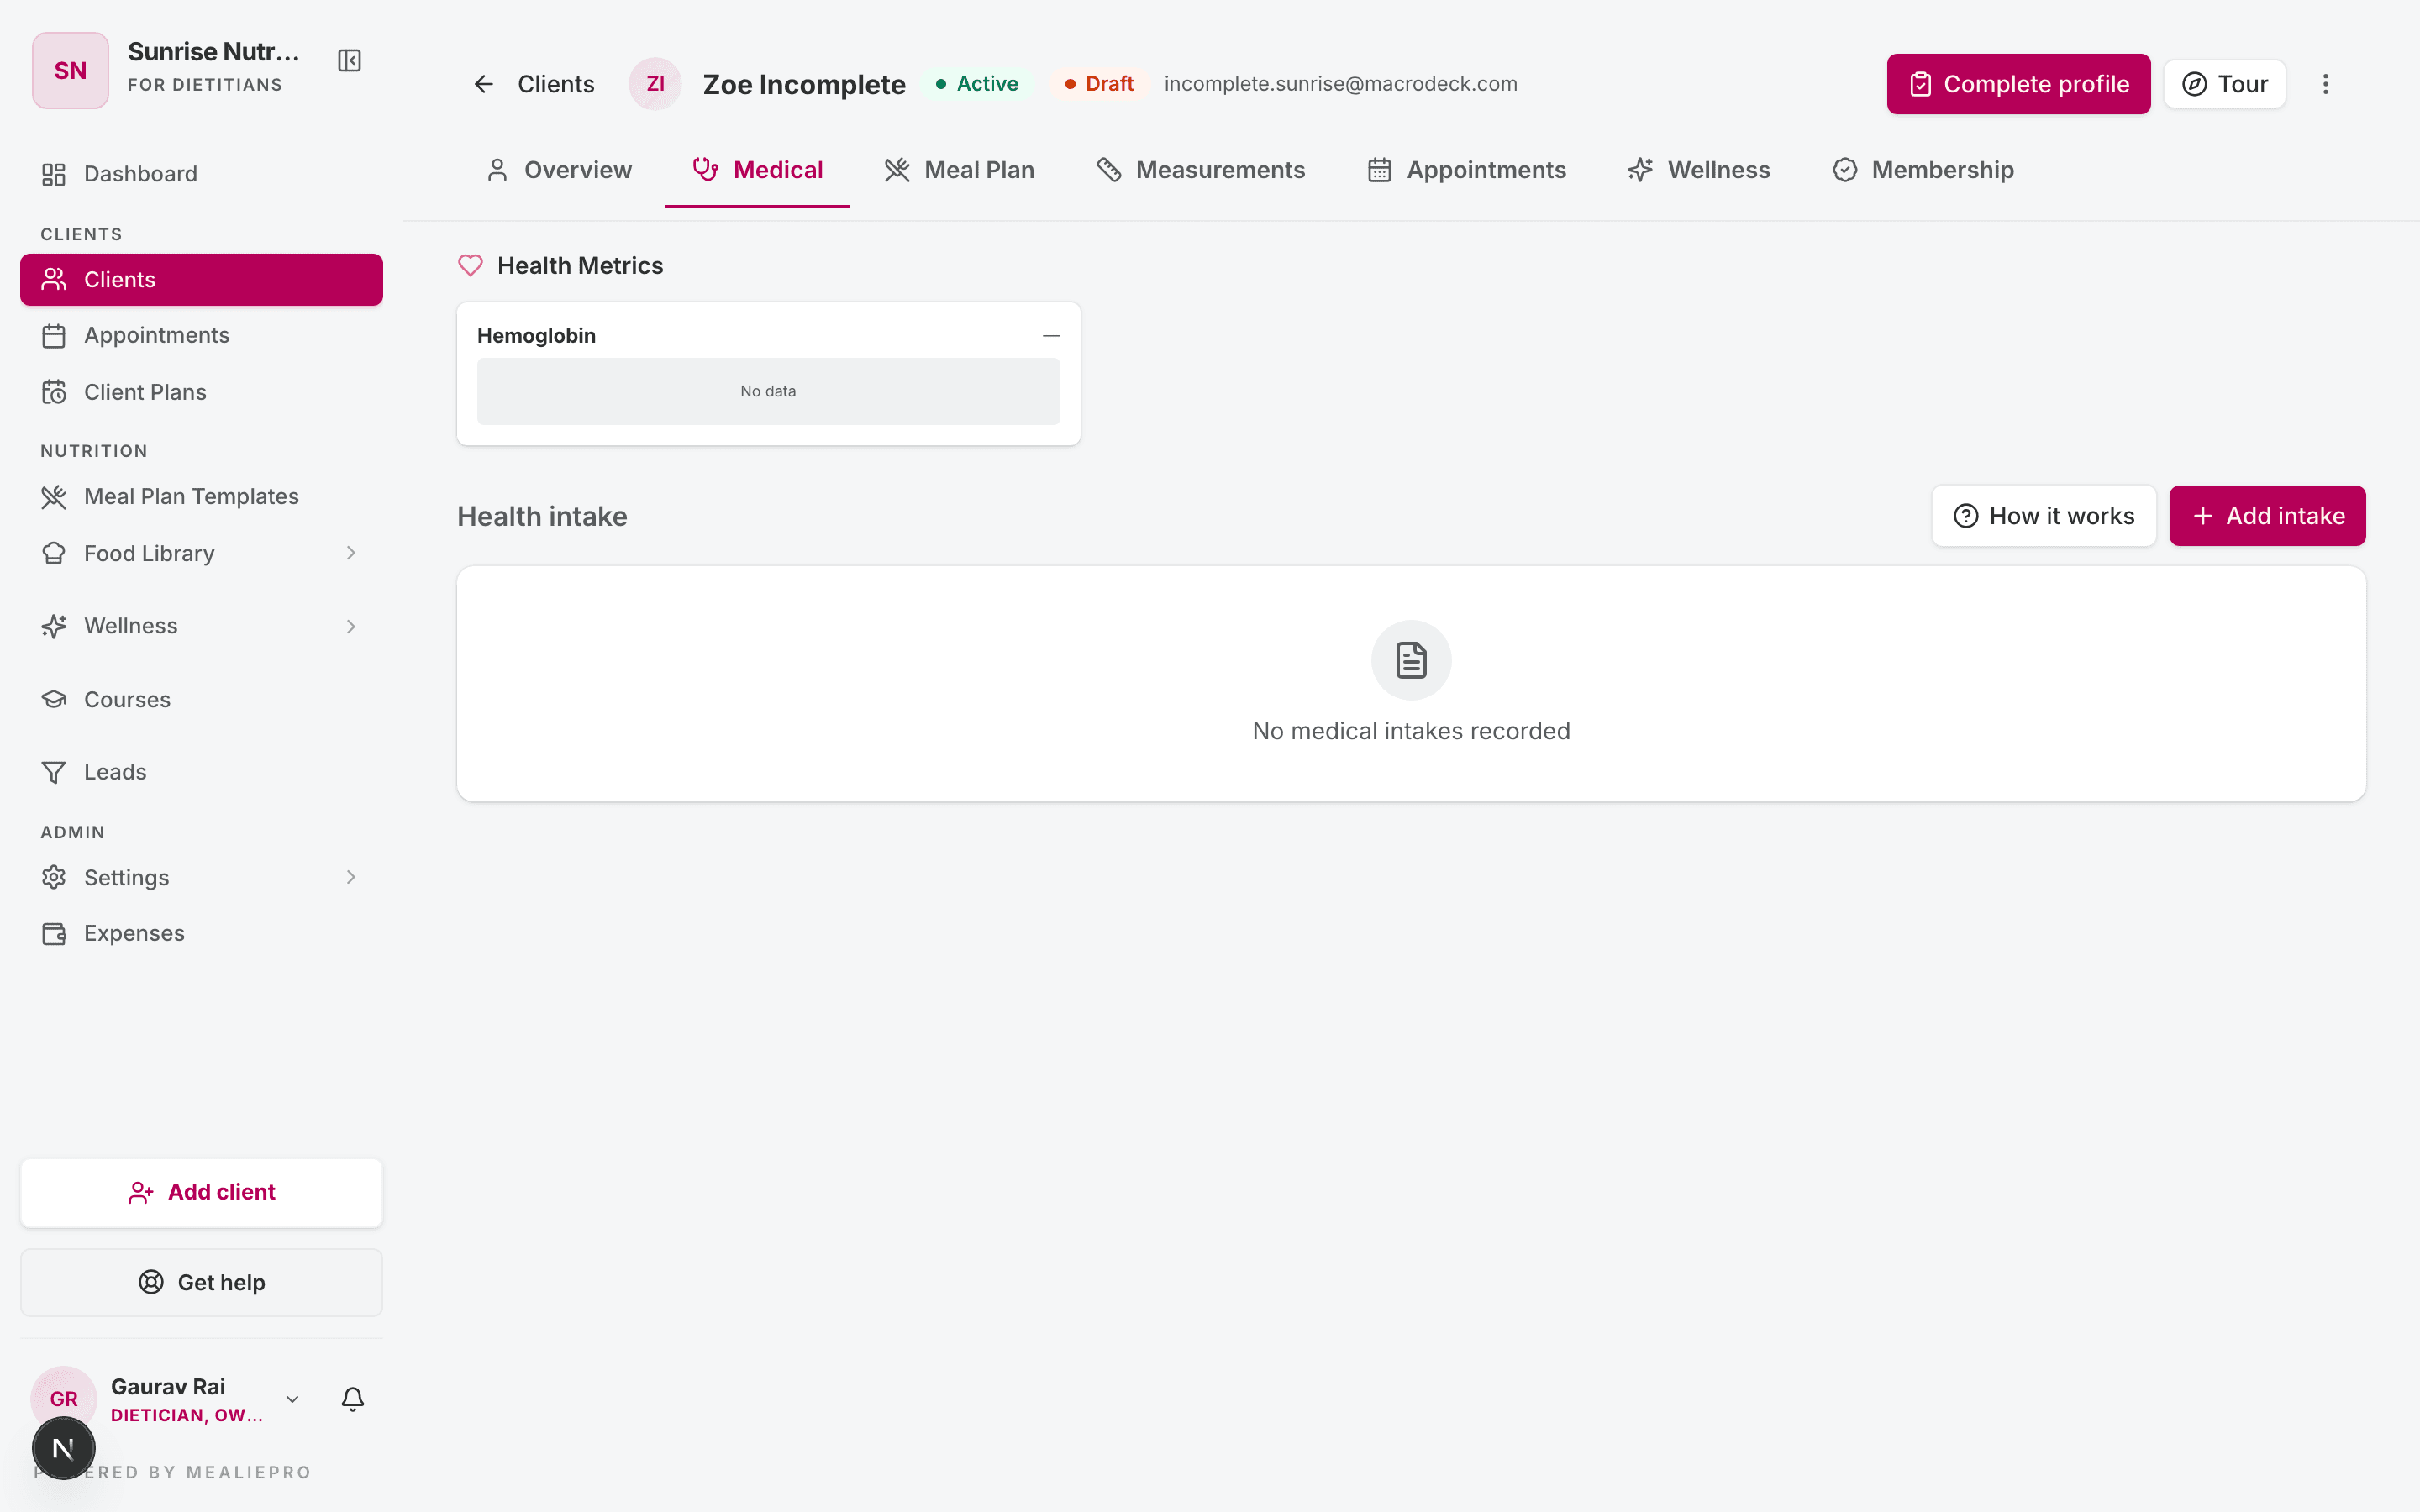
Click Add intake to record a structured medical intake (history, current medications, lab values). Anything you record here is used by the AI meal plan generator to filter recipes.
Meal Plan
Where you generate, assign, and review meal plans for this client.
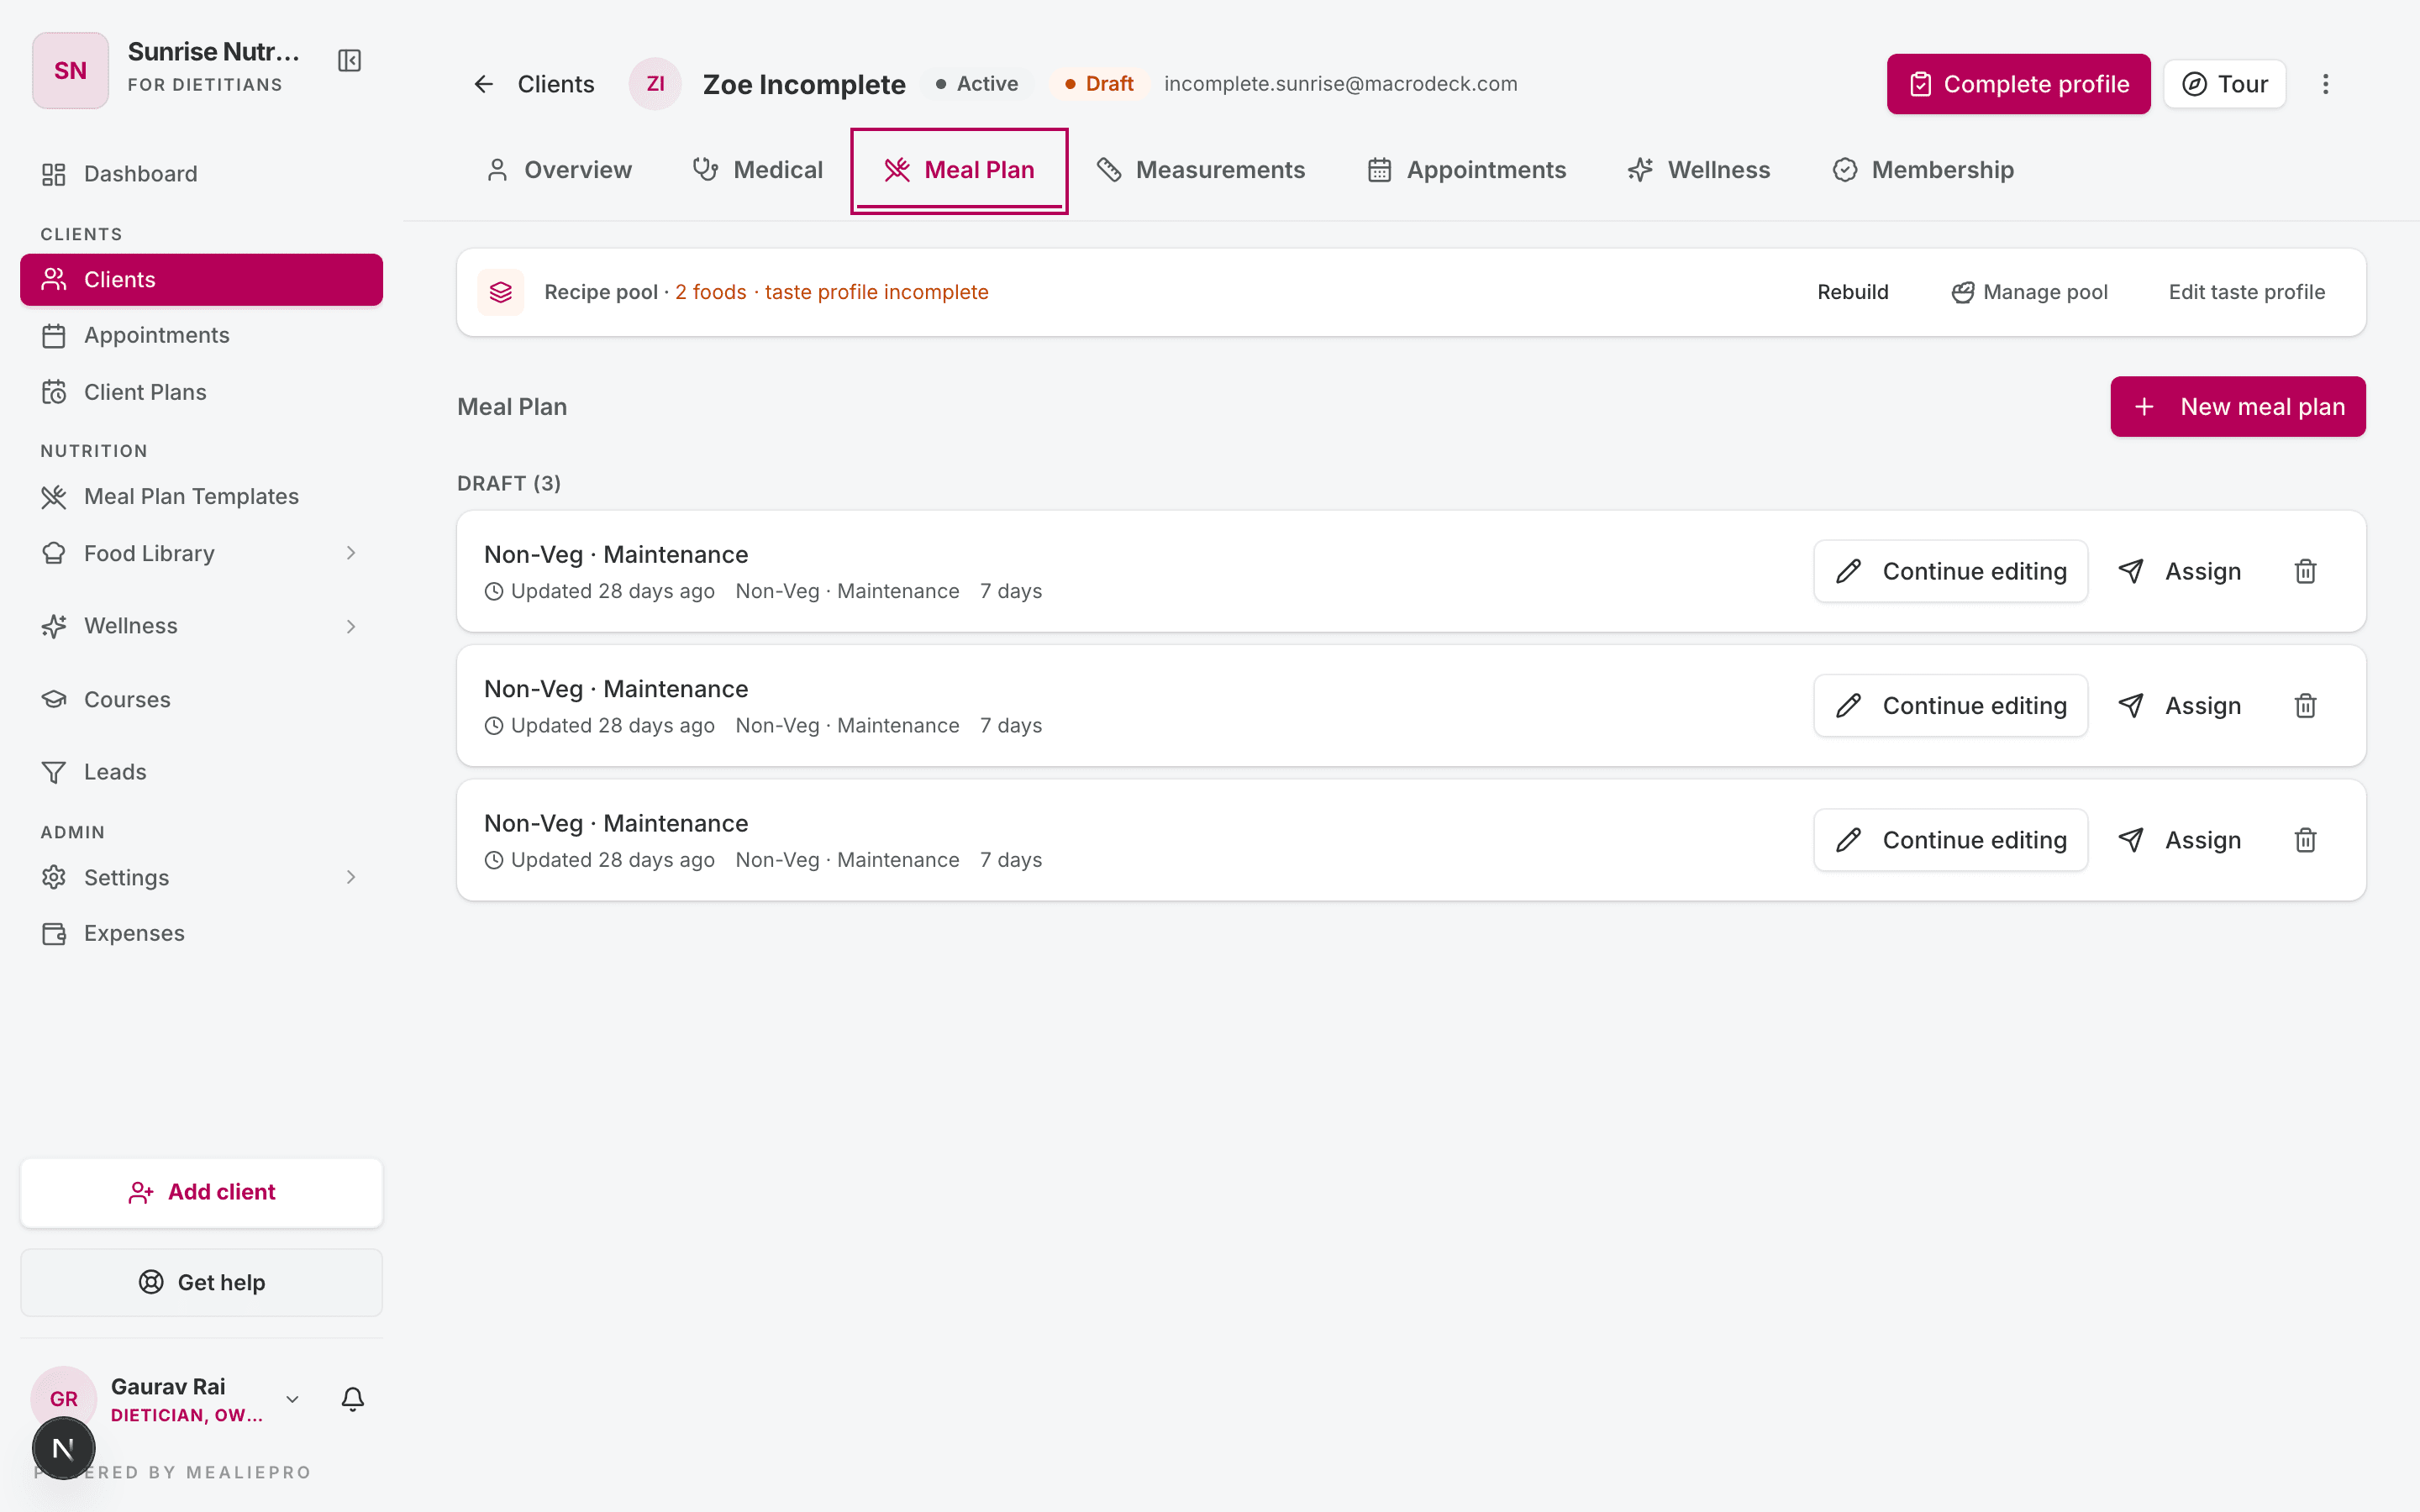
Click New meal plan to open the AI workspace for this client — it already knows their targets, conditions, allergies, and taste profile. Everything already built for them is listed below, grouped as Active · Scheduled · Draft · Past, and you assign, pause, or activate a plan from its own row.
The food pool — the set of dishes available to this client after their conditions, allergies, and taste profile are applied — opens as a dialog from this tab. Everything downstream (generation, assignment) draws from that filtered pool, so it's worth a look if a plan keeps picking dishes you don't expect.
(See Meal plans for the full meal plan walkthrough.)
Measurements
Body measurements over time — weight, body fat, circumferences, photos. Charts the trend automatically.
Appointments
Past and upcoming appointments scoped to this client. See Appointments.
Wellness
The client's assigned wellness tasks, their daily check‑in history, and their tracking‑field trends. Assign tasks individually or drop a whole program on them in one click. See Wellness.
Membership
Which client plan they're enrolled in, when it started, and when it expires. If they aren't enrolled you'll see Assign a plan here — this is the tab to come back to when a plan lapses and you want to renew it.
Bulk import (CSV)
For migrating from another tool, use the Import button on the Clients list. Upload a CSV with one row per client and MacroDeck creates them all in one go.
Start with the sample. The dialog has a Download sample CSV button — it gives you the exact header row plus two filled-in examples. Easier than transcribing the column names:
email,full_name,phone,date_of_birth,gender,height_cm,weight_kg,goal_weight_kg,activity_level,health_goal,clinical_notesemailandfull_nameare required on every row. The rest are optional.- Header matching ignores case and surrounding spaces, and extra columns are skipped, not rejected — so an untouched export from your old tool usually just works.
- Up to 500 rows per upload, and the file must be under 2 MB.
Rows are validated independently and it's a partial success: valid rows are created, invalid ones come back listed with their row number and what was wrong. Fix just those and re‑upload — the ones that already landed aren't duplicated.
Imported clients are not emailed. Nobody gets a portal invitation from an import. Send those individually from each client's profile when you're ready.
What's next
The client is set up. From here:
- Meal plans — build a template, generate a plan with AI, assign it to your client.
- Client plans — the programs you enrol clients into, and what happens when one expires.
- Wellness — assign daily habits and tracking fields alongside their meal plan.
- Medical reports — turn a client's uploaded lab result into a structured intake.
- Messages — talk to the client inside the product.